
Crafting varraks (kites) is a tradition carefully preserved in the streets of ever-growing cities. Memories of trips to the mountains at dawn, the warm April sun, childhood, and the people who were once close to us have come together to form the Kite Festival.
The festival is now in its second year. Last spring, we spoke with library staff, friends, relatives, and neighborhood kids about how to make a kite that could become a tiny point in the sky. We traveled to Parkent on an expedition to collect the best examples and held two workshops. This year, we are ready to share the result of our work. Behind us are dozens of tests, measurements, and experiments with materials — and now the instructions are in your hands.
MATERIALS:
- tracing paper or thin paper;
- five flexible reed sticks;
- a spool of strong thread;
- ribbons;
- double-sided tape;
- glue.
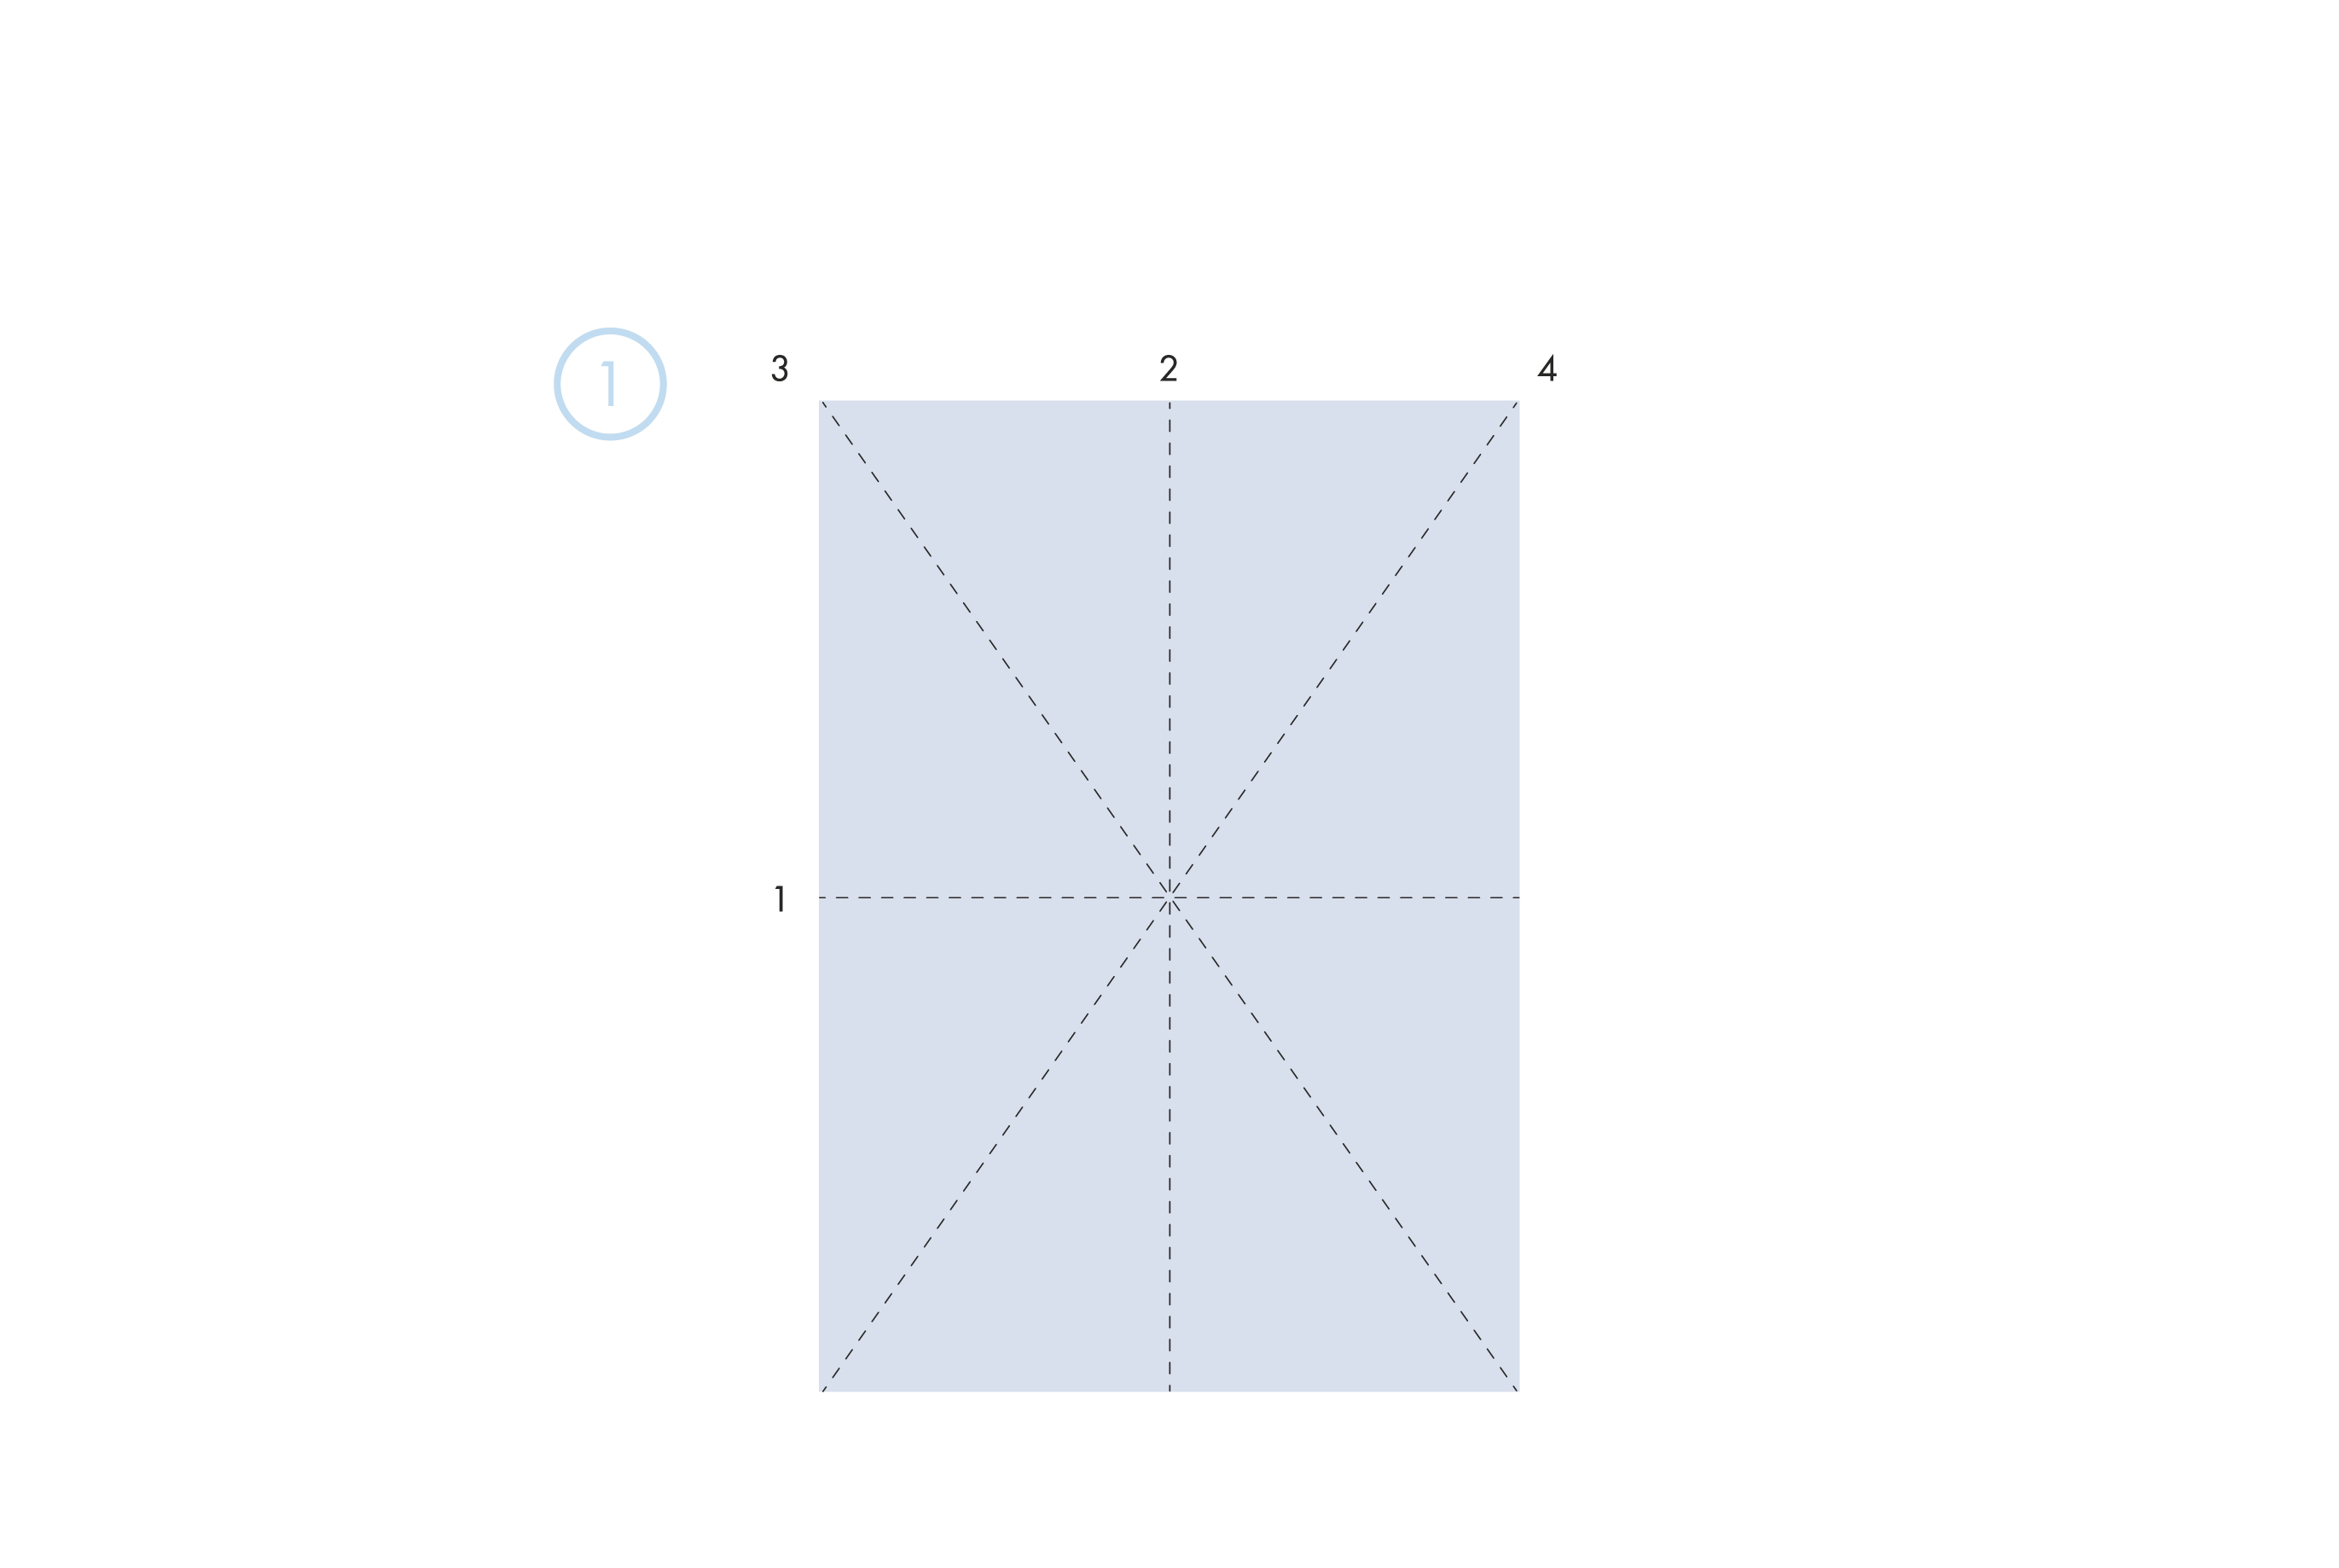
Prepare the base. Fold the sheet of paper twice and then diagonally.
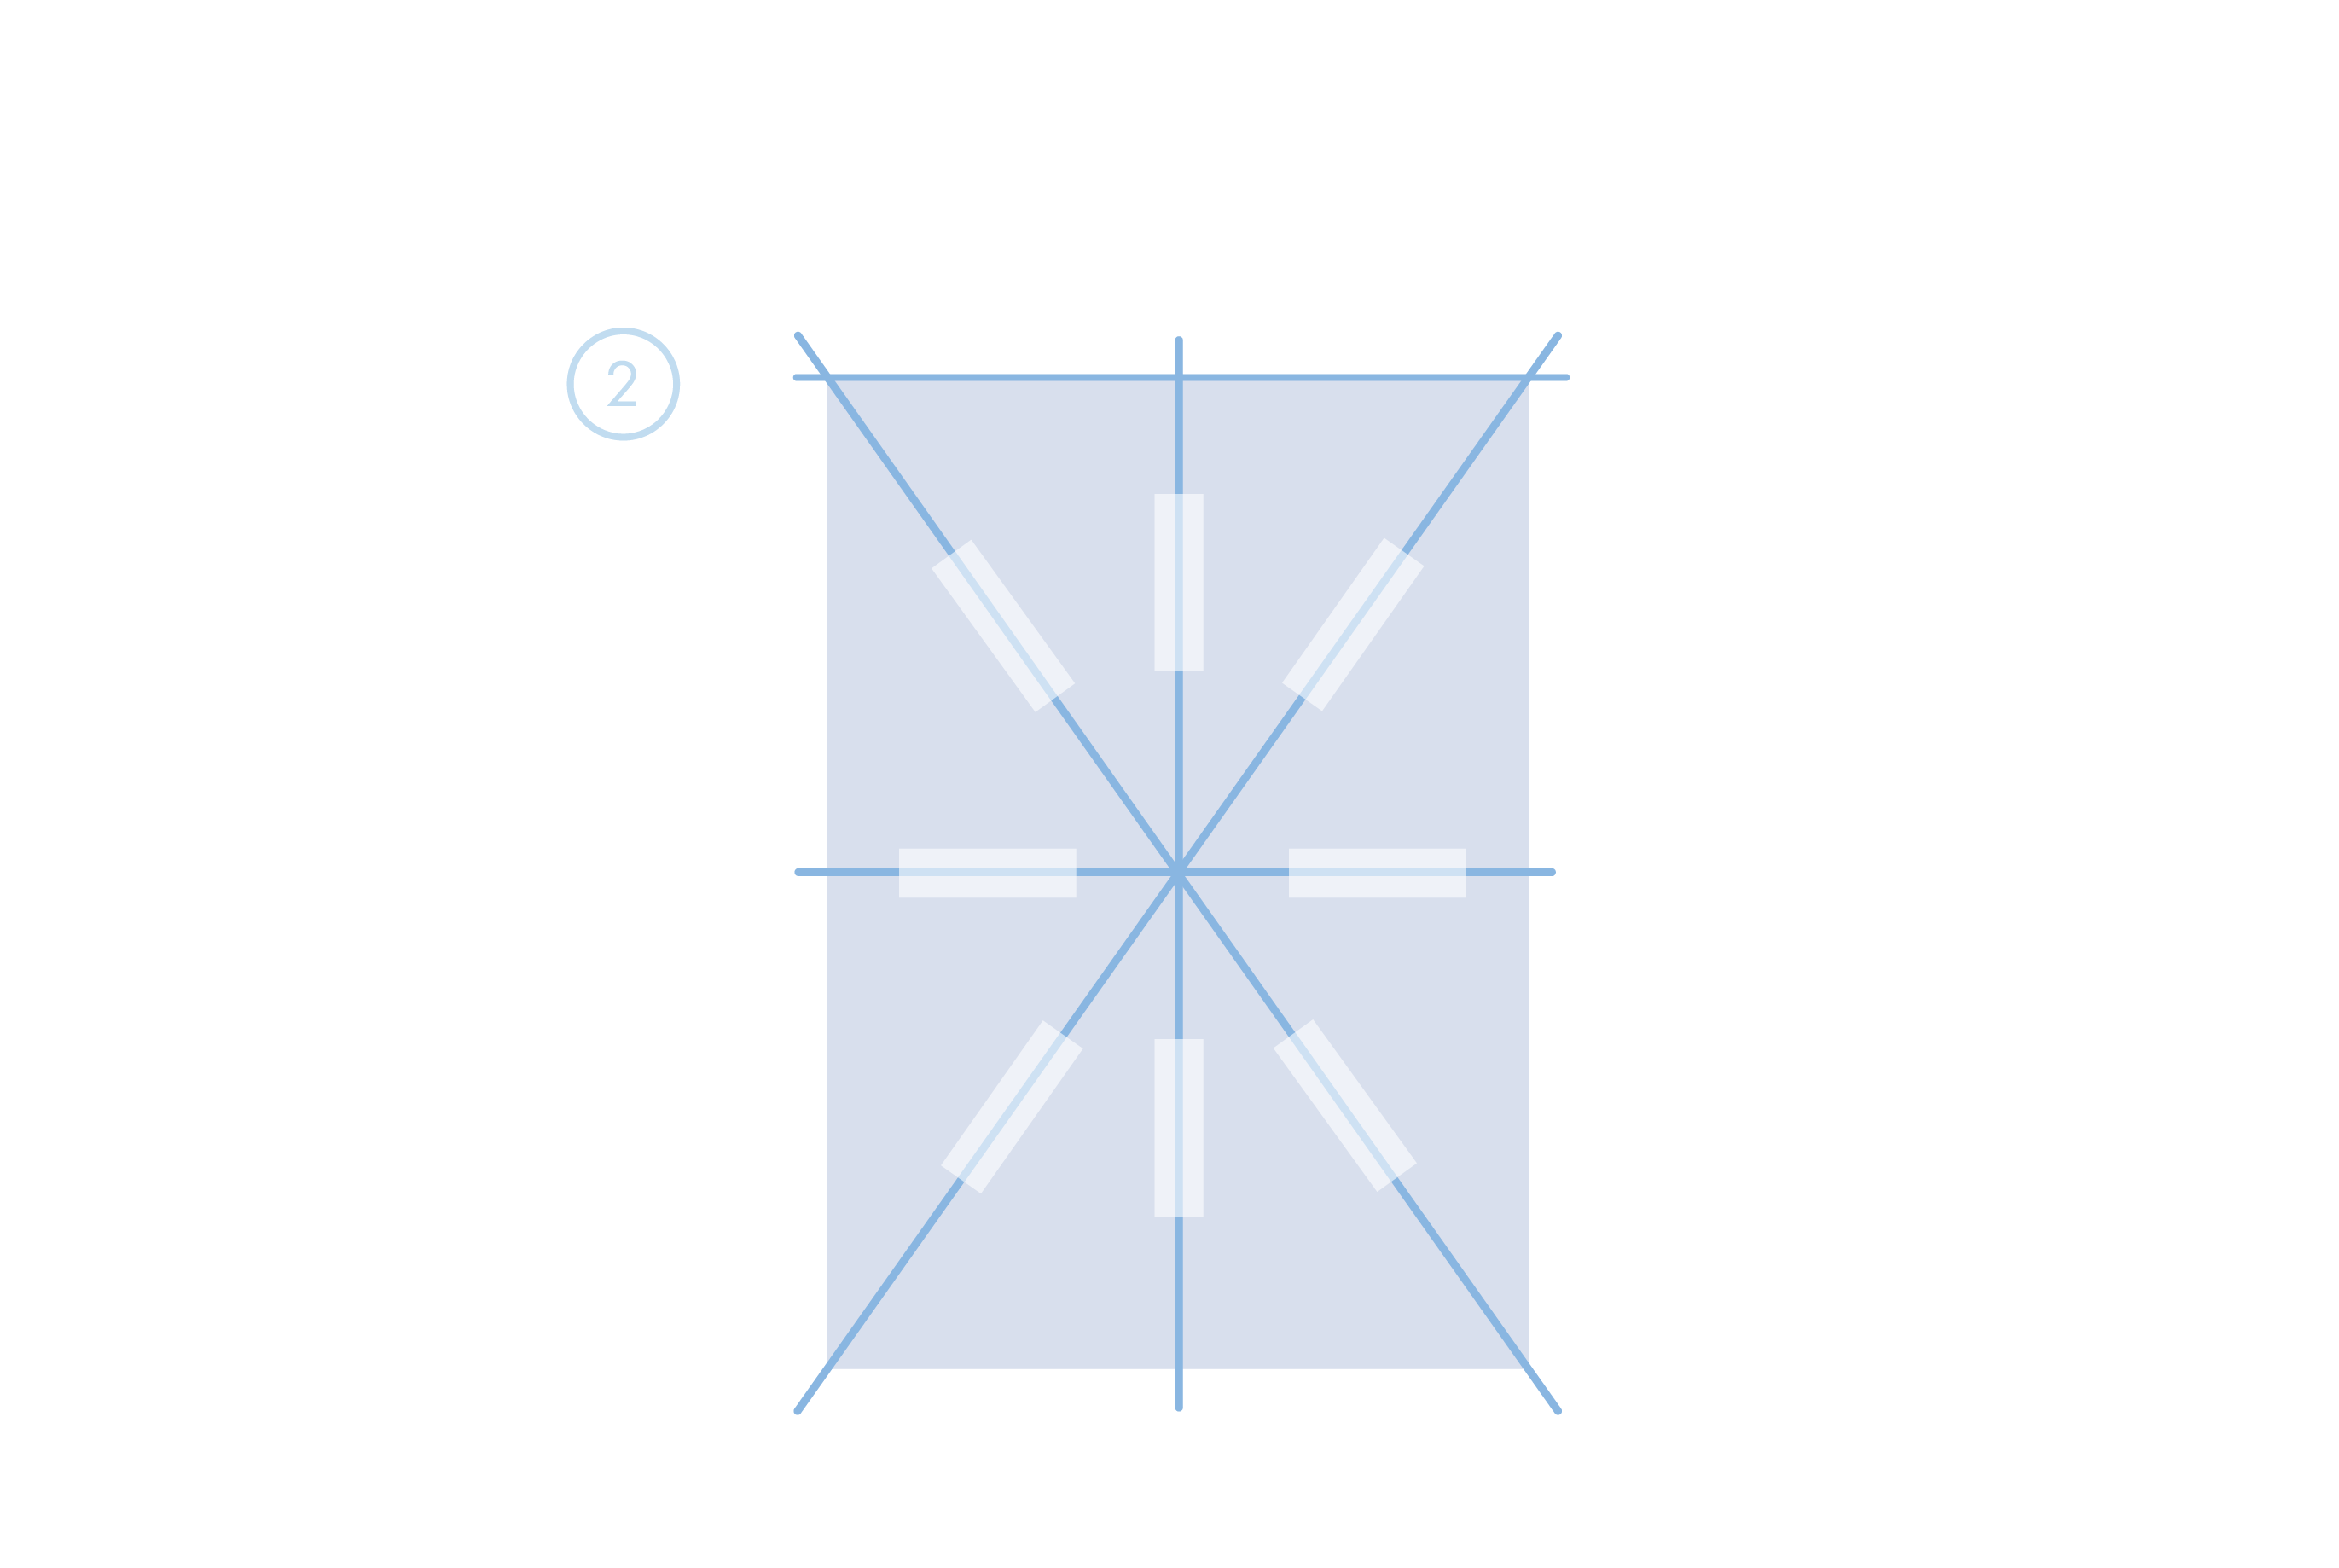
Attach the reed sticks along the fold lines using double-sided tape and paper patches.
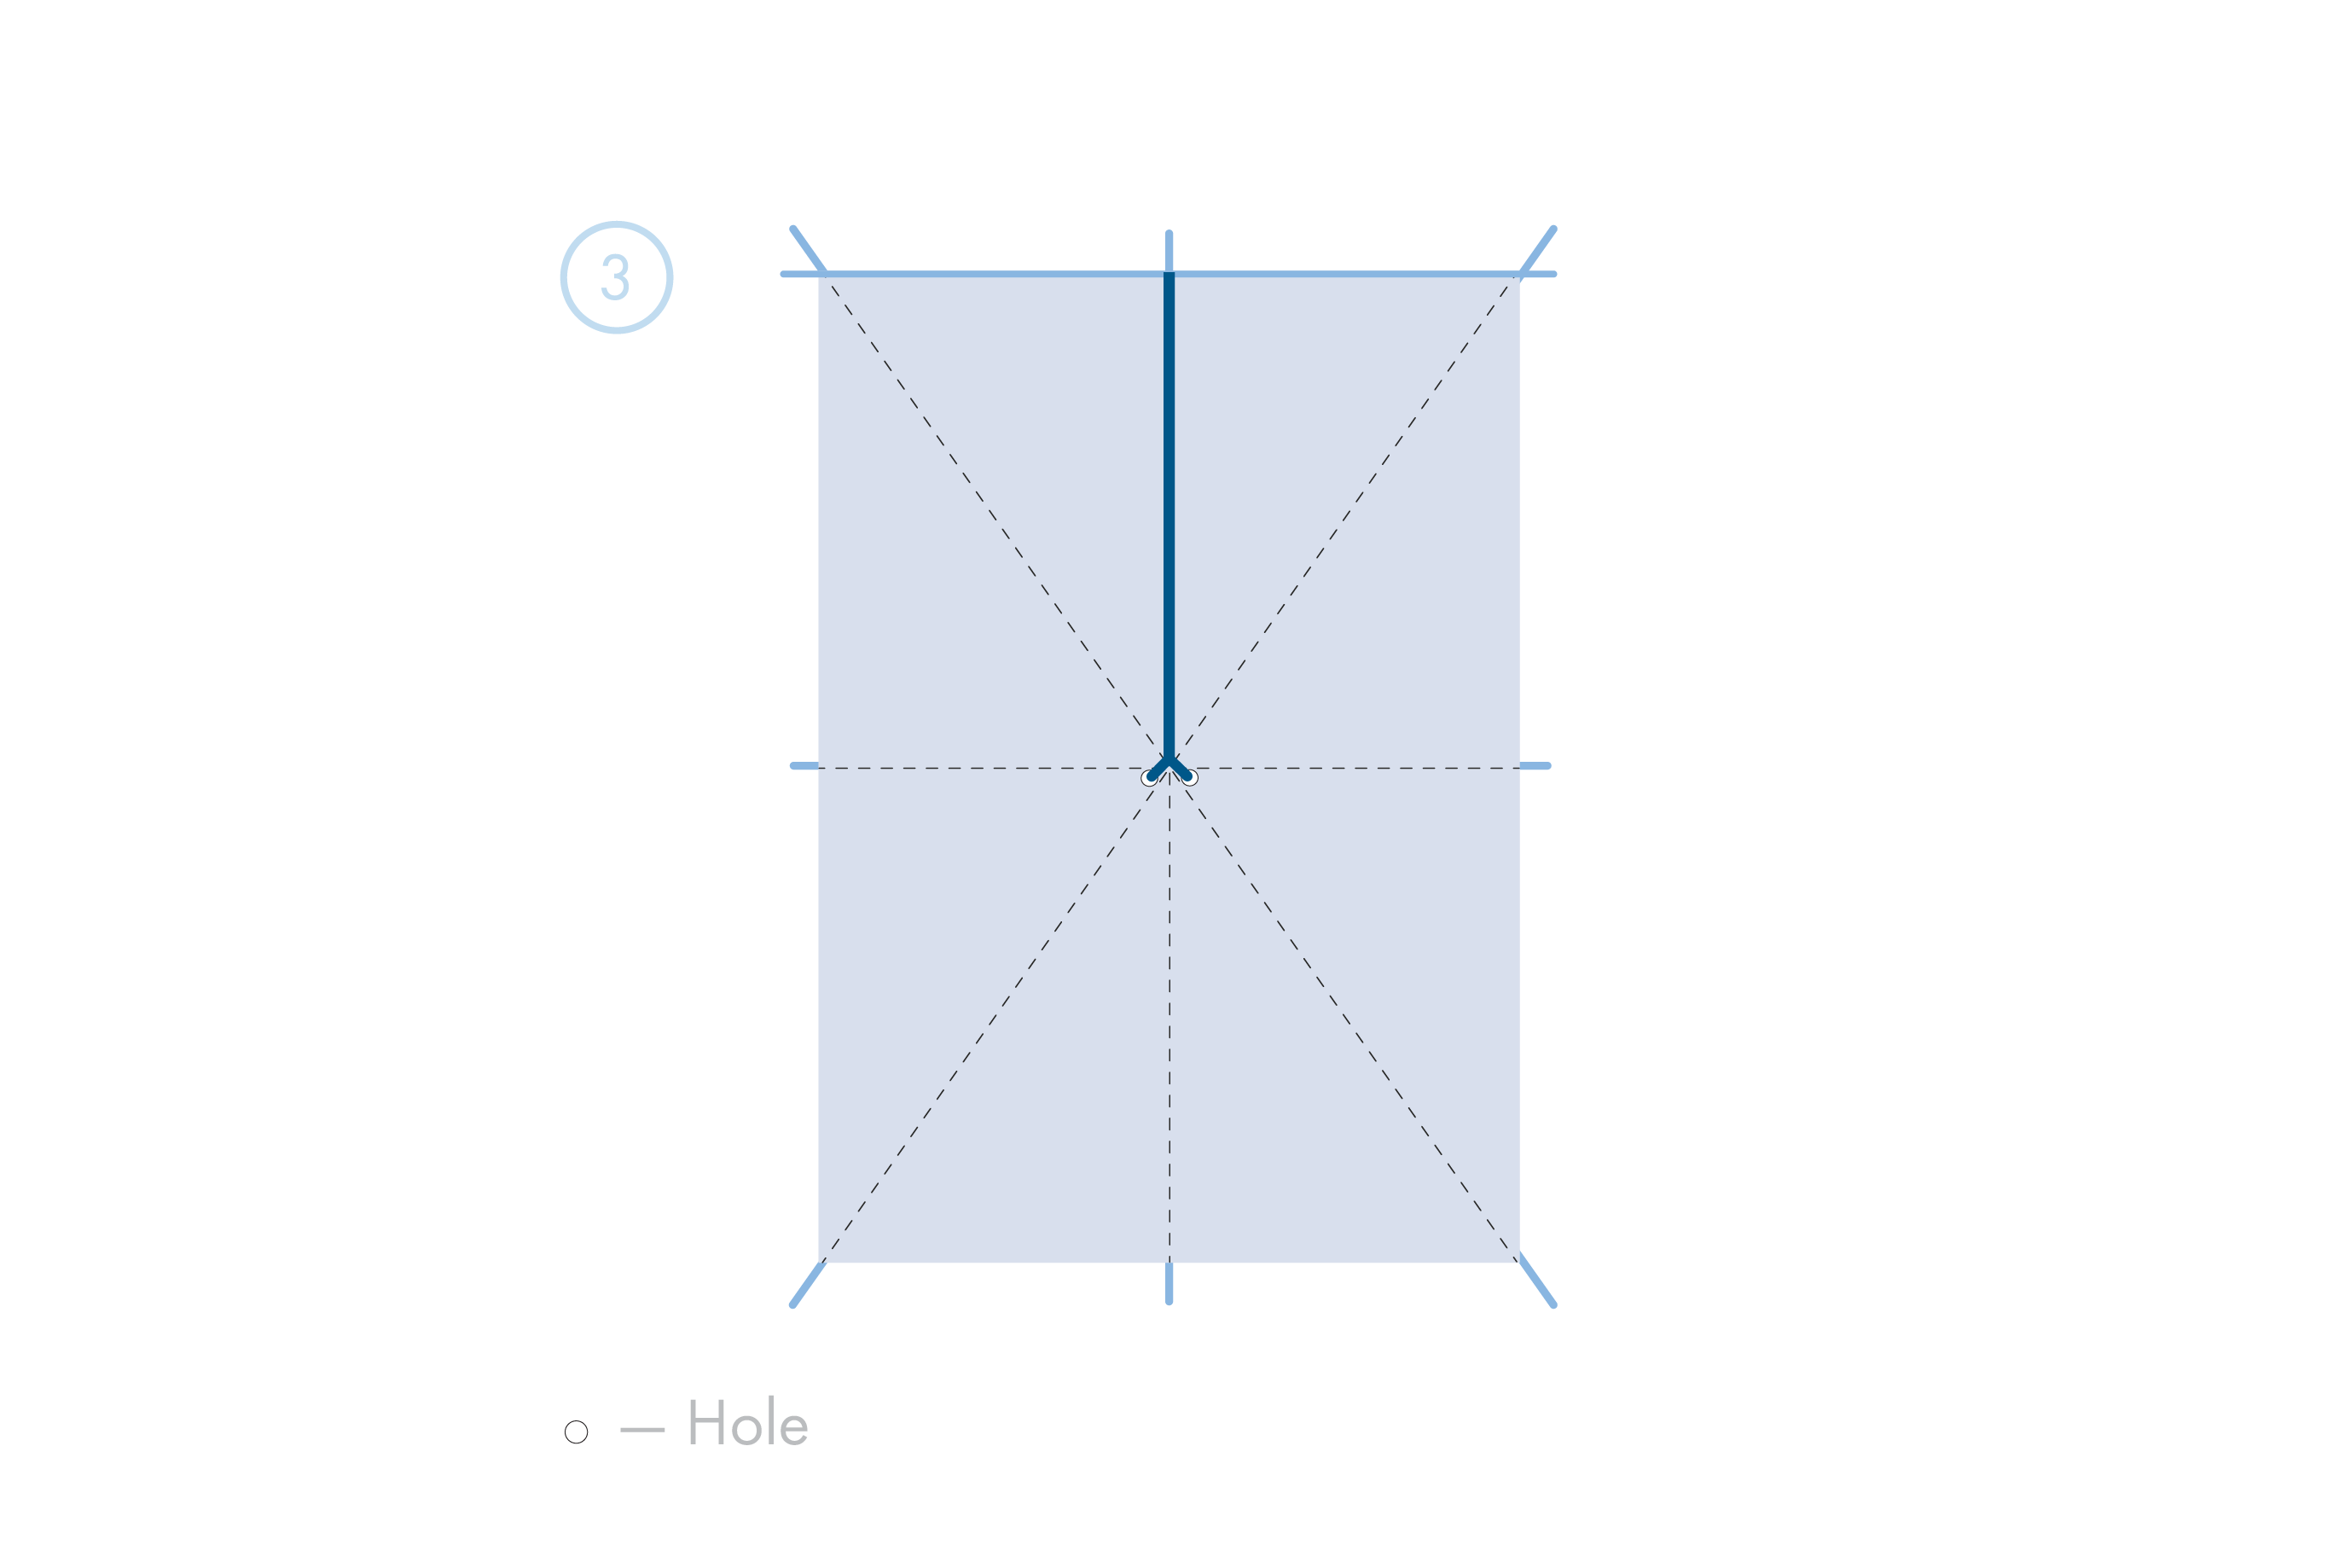
Use a needle to make two holes at the center point of the kite. Thread the first string through them and tie the paper to the reeds. Make sure the string reaches the top point of the kite.
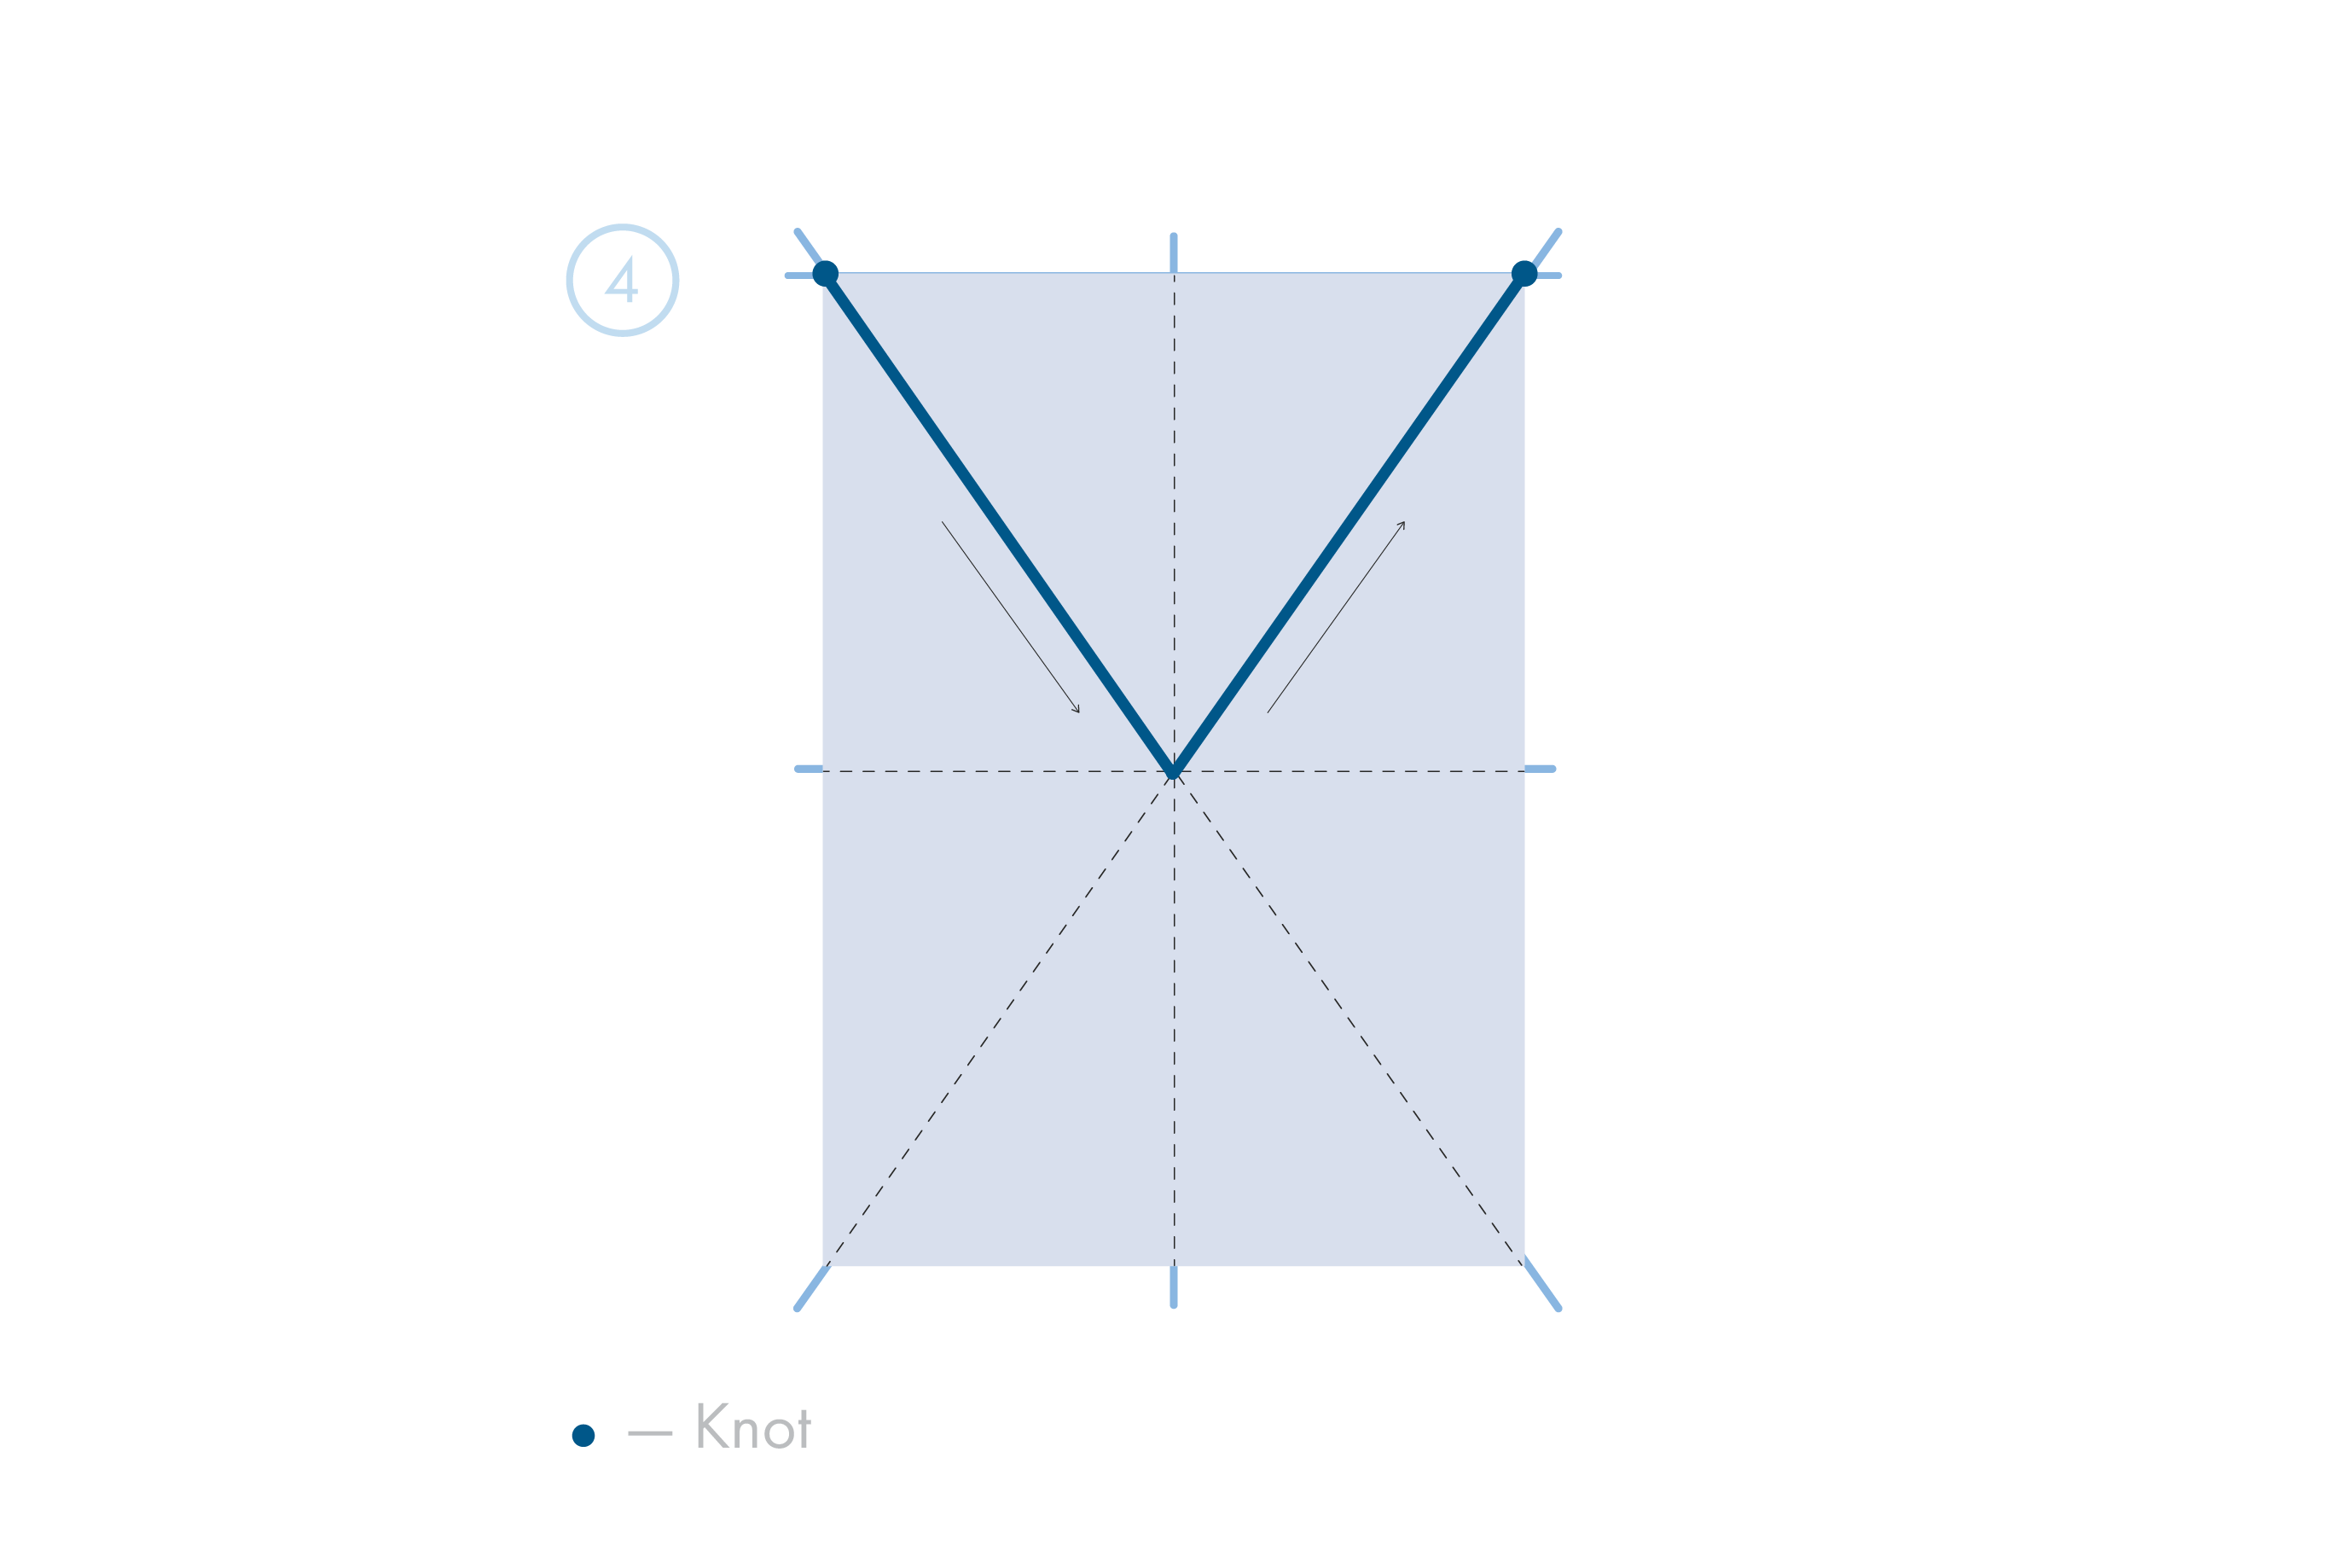
Secure a second string between the upper corners so that its midpoint reaches the center.
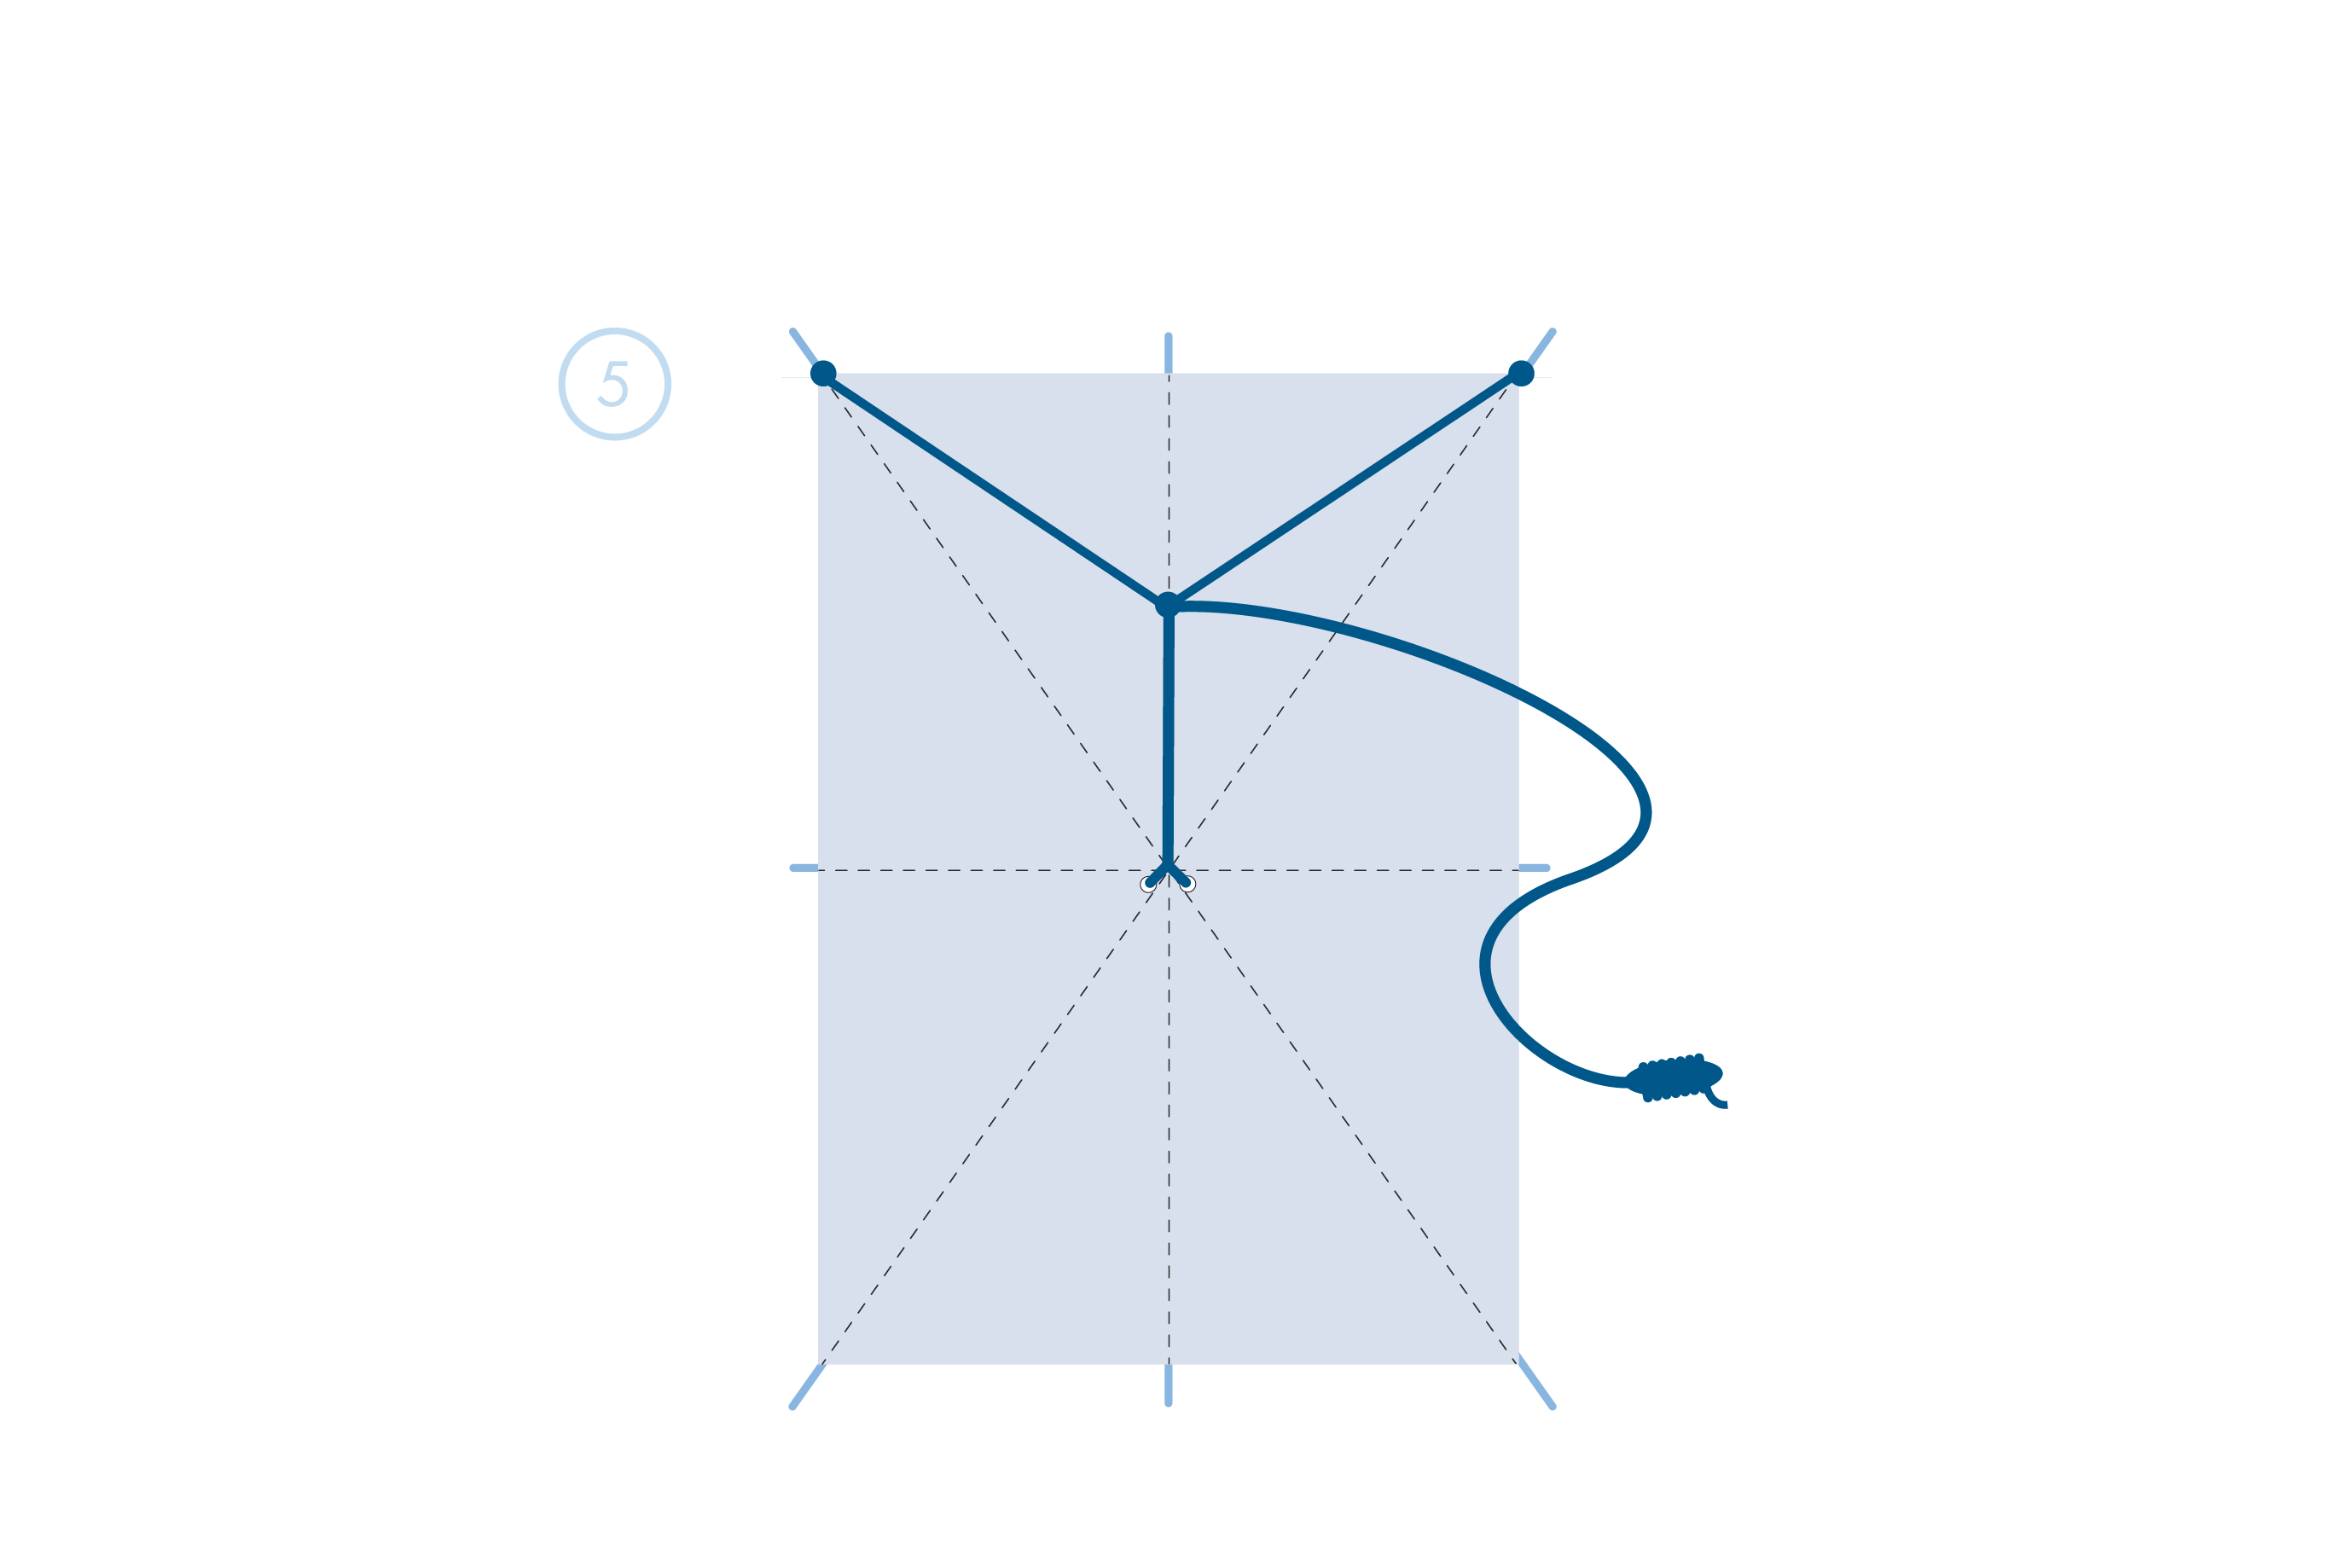
Connect the first string to the second at the center and tie them to the main spool thread.
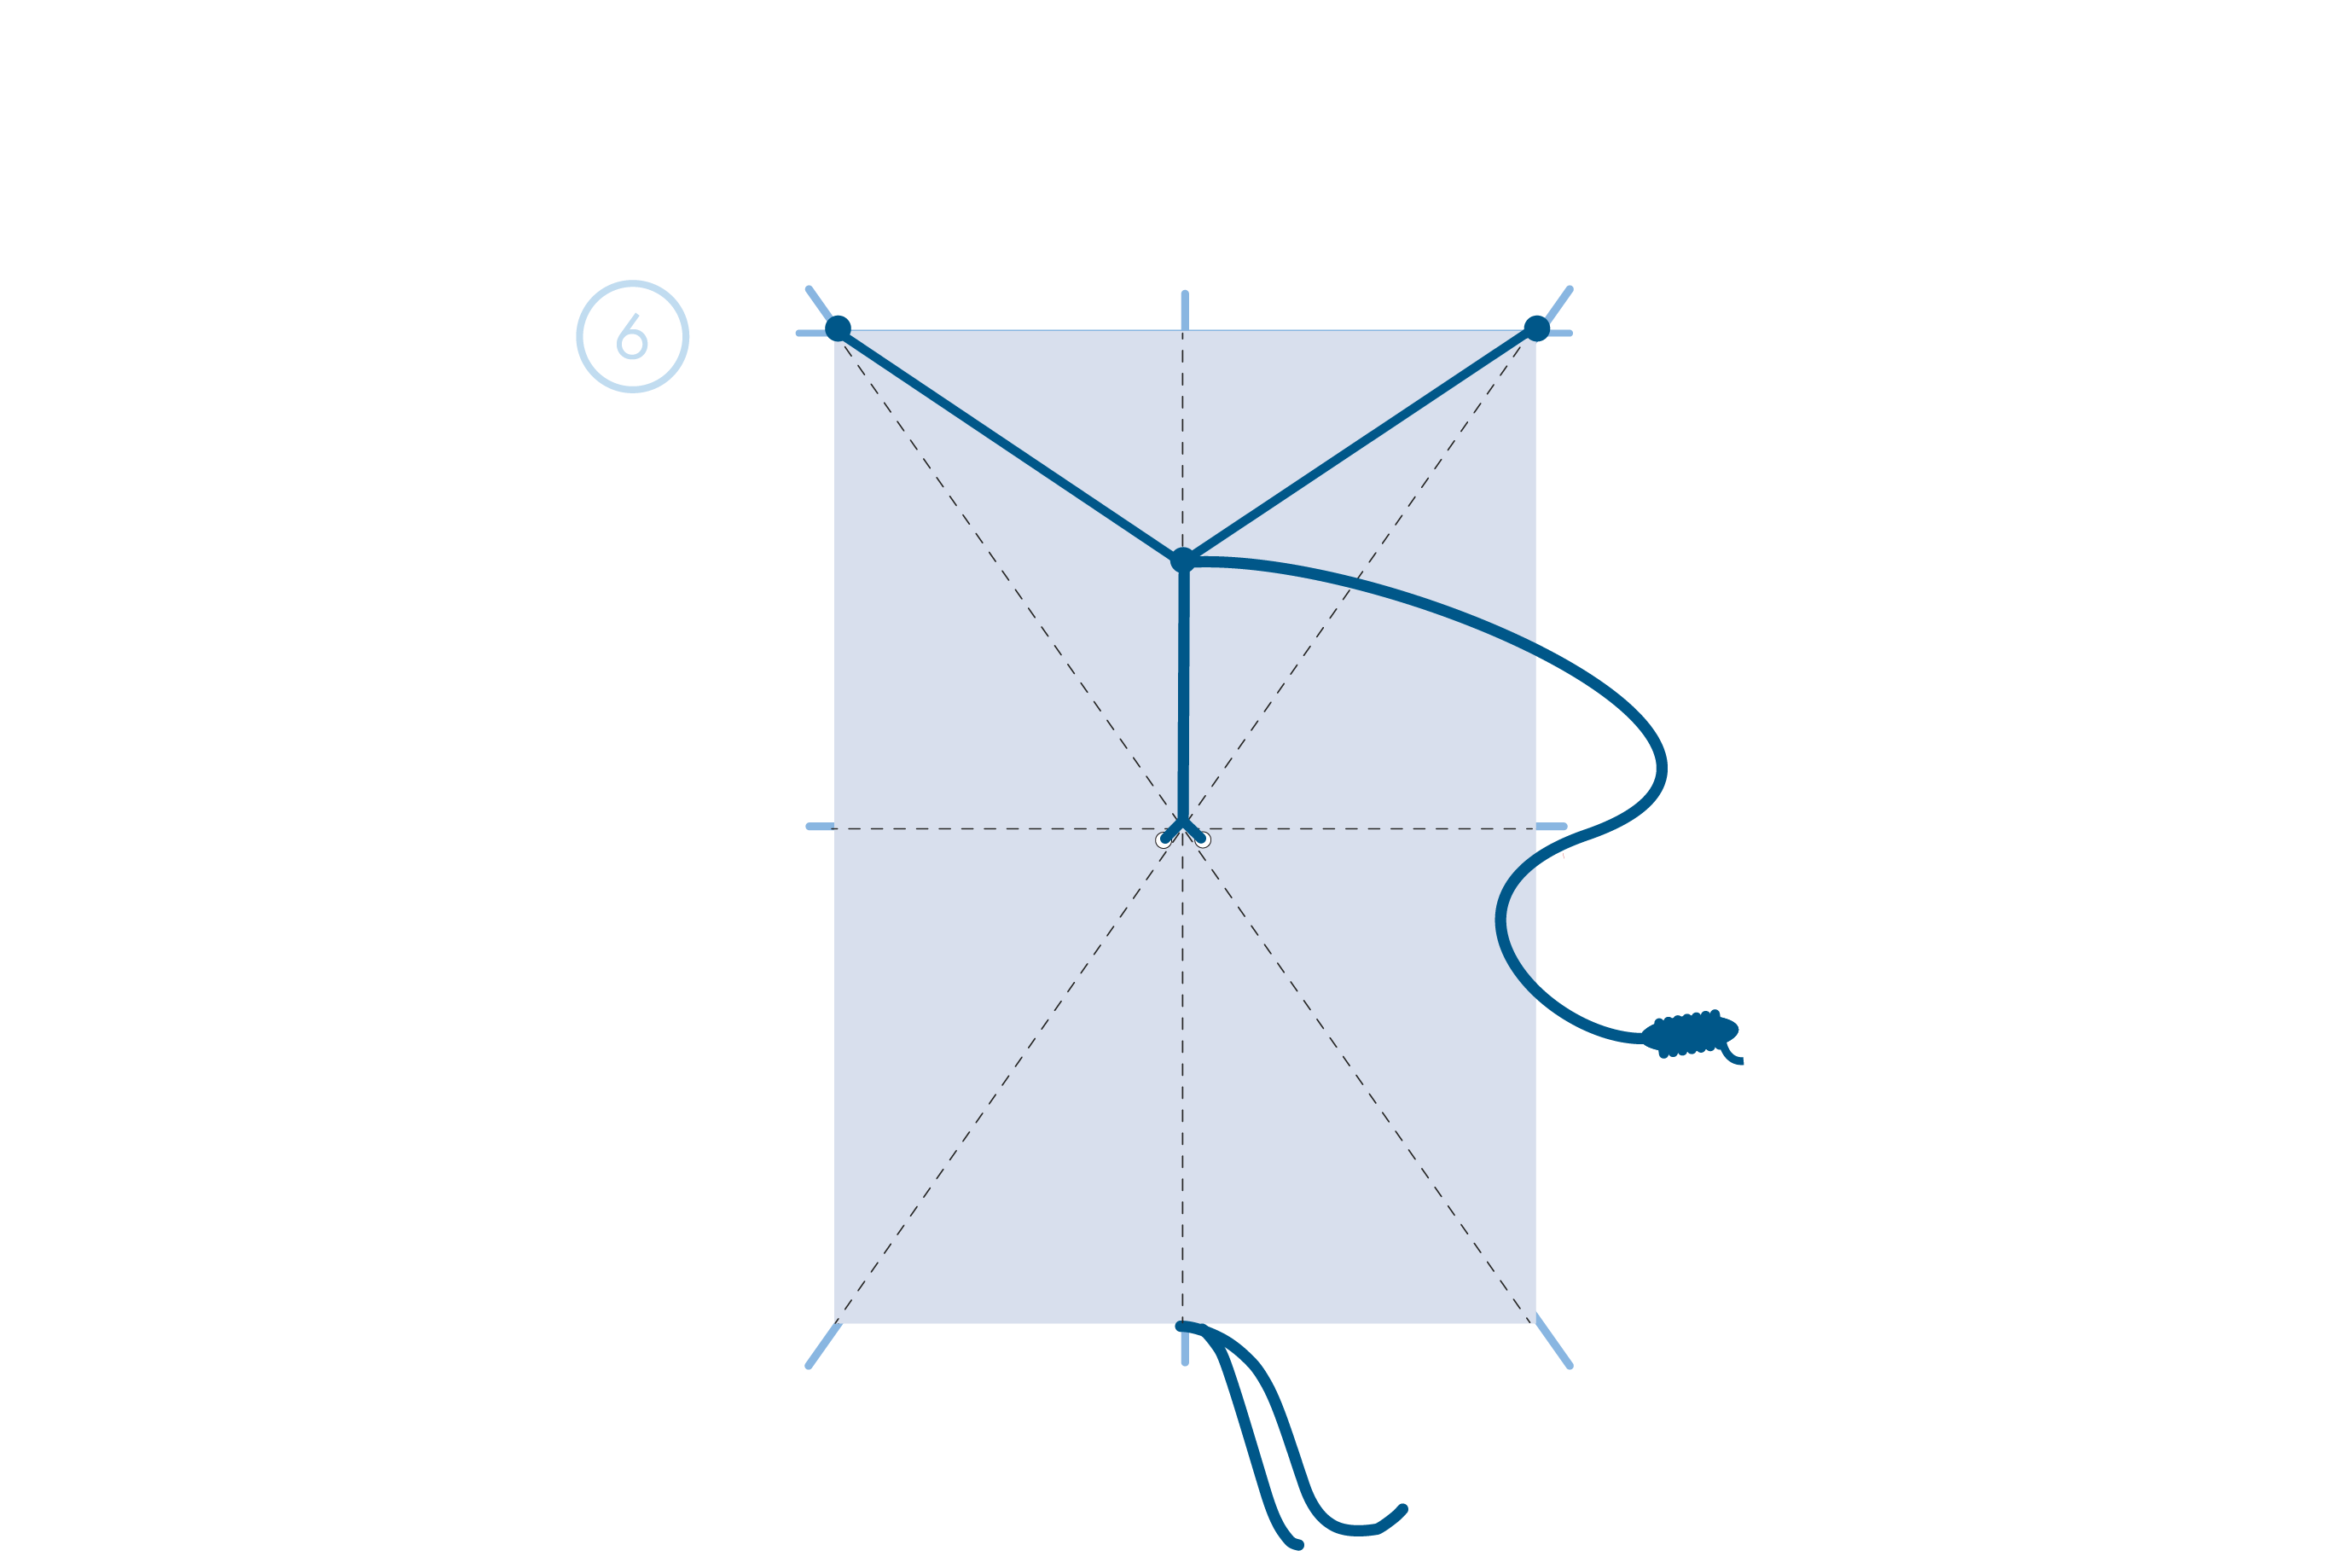
Add a ribbon at the bottom center — this tail will help the kite to balance.
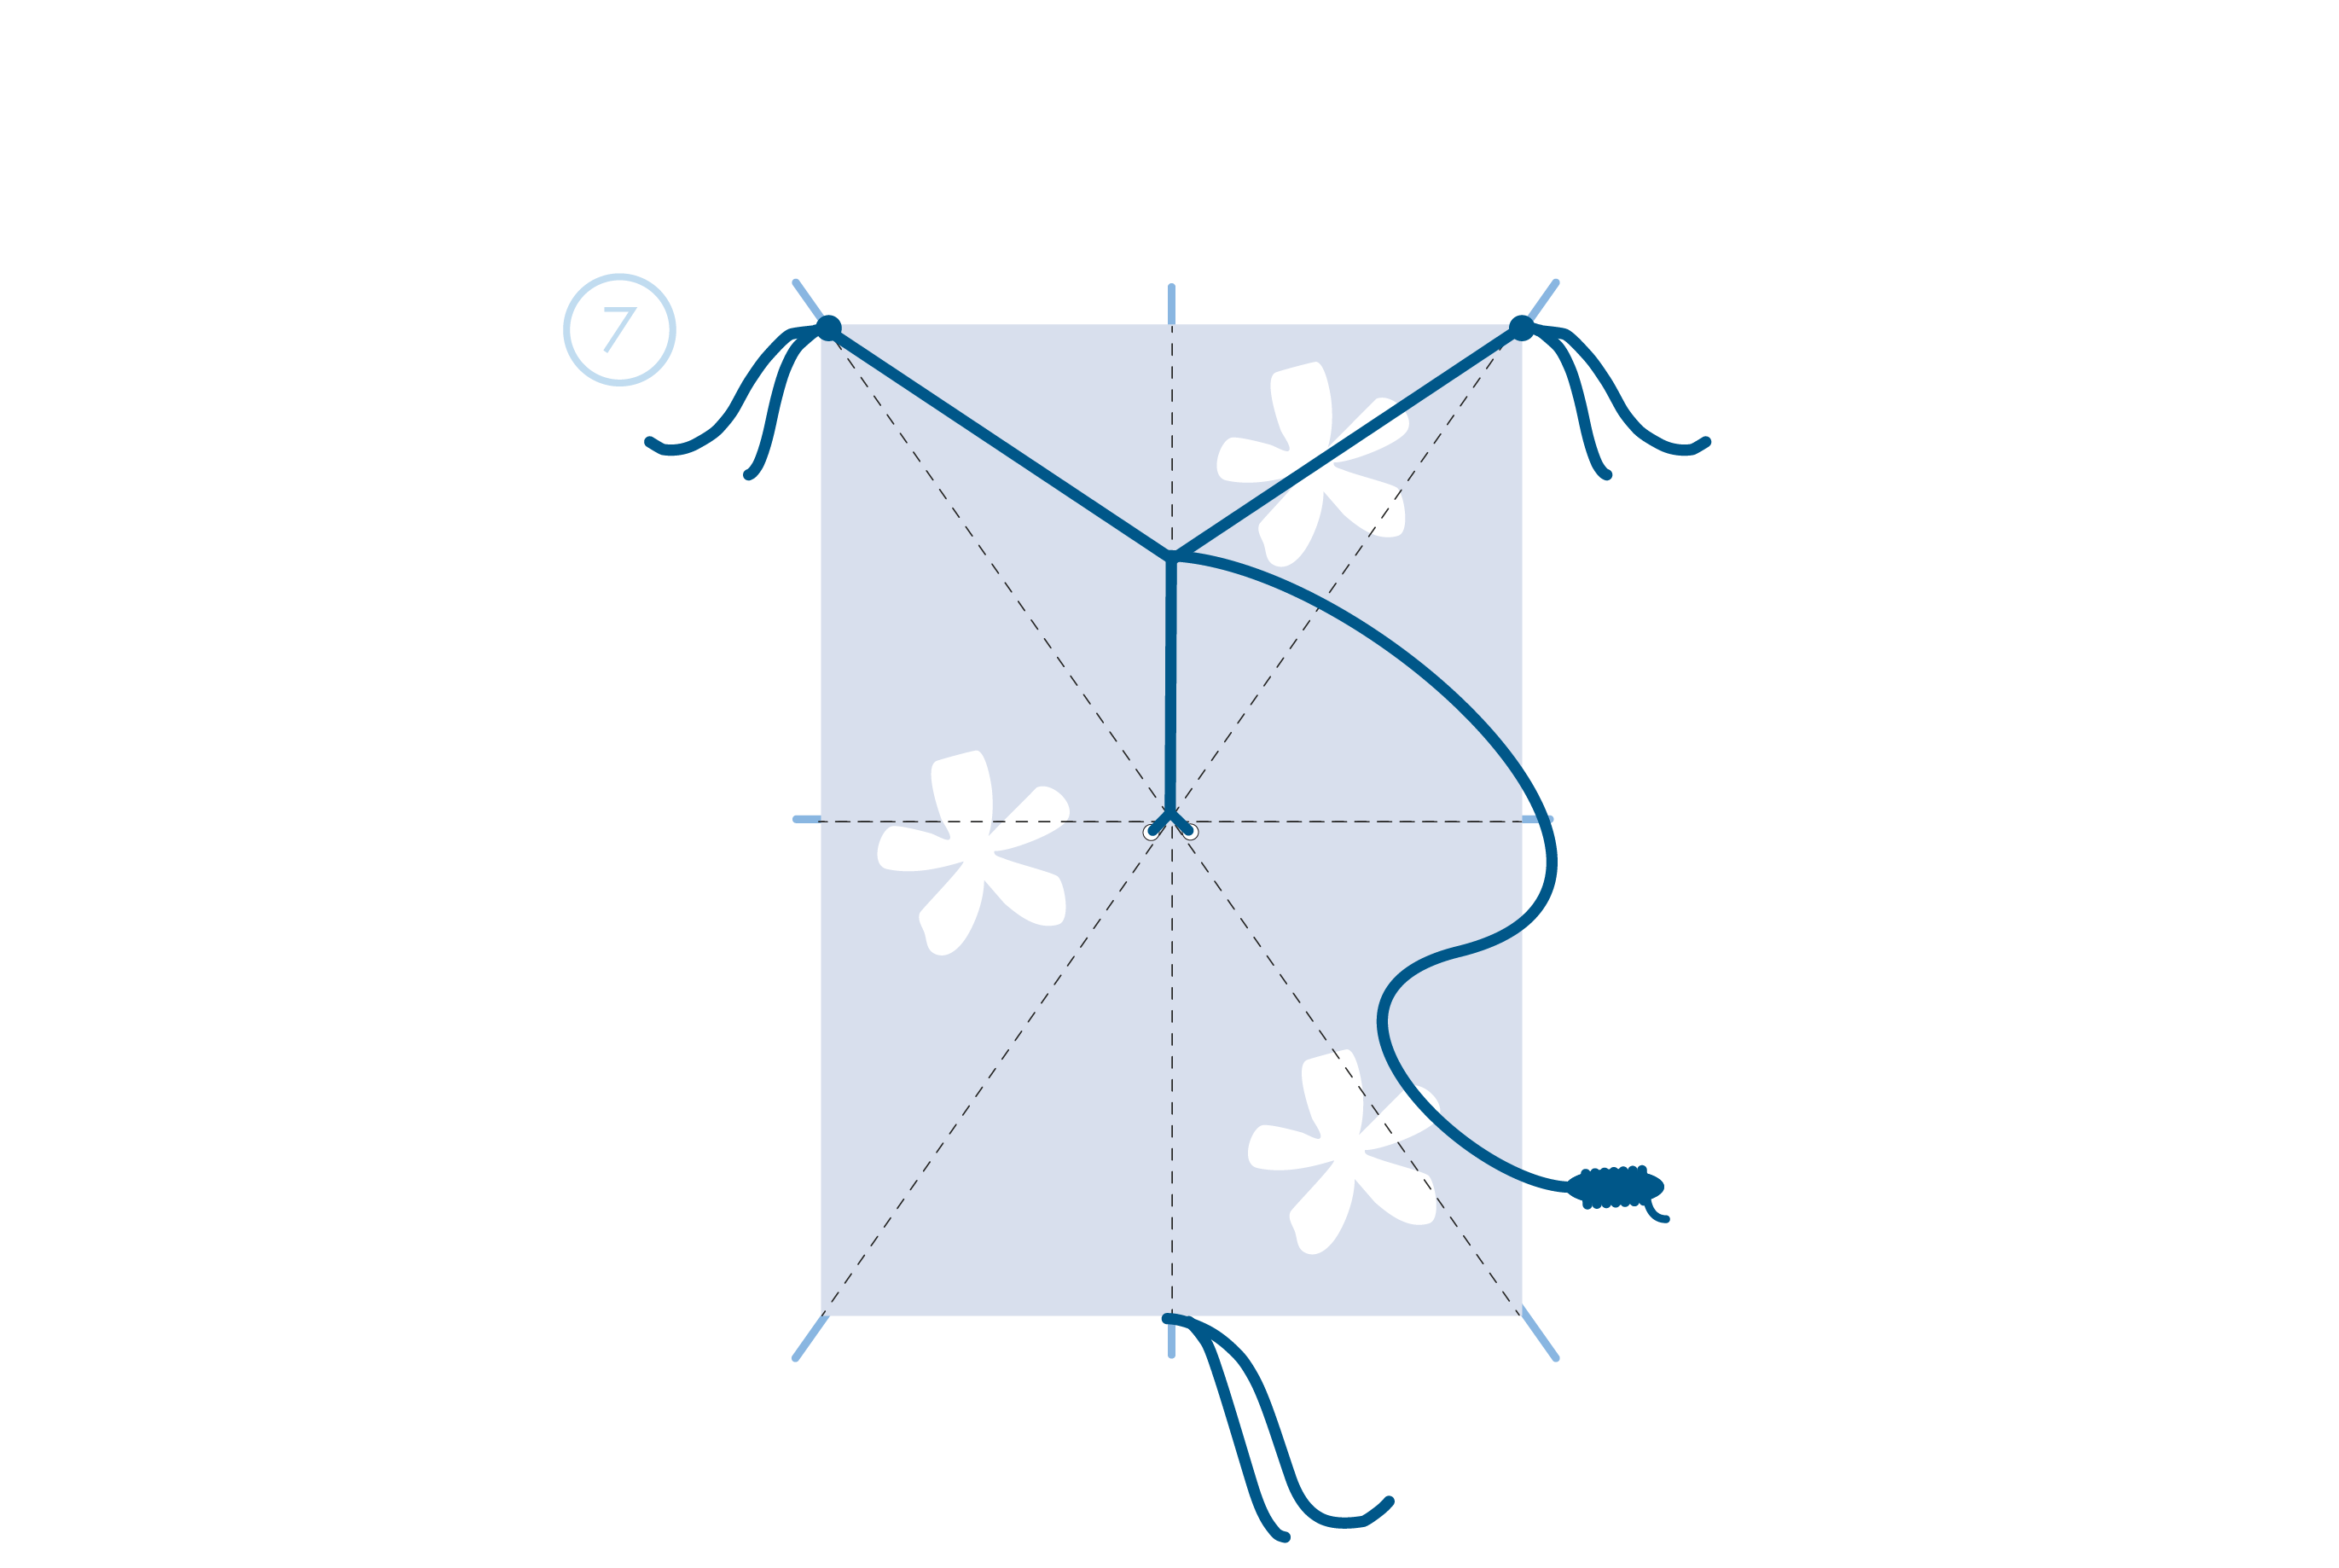
Decorate the kite with ribbons, appliqués, and drawings.
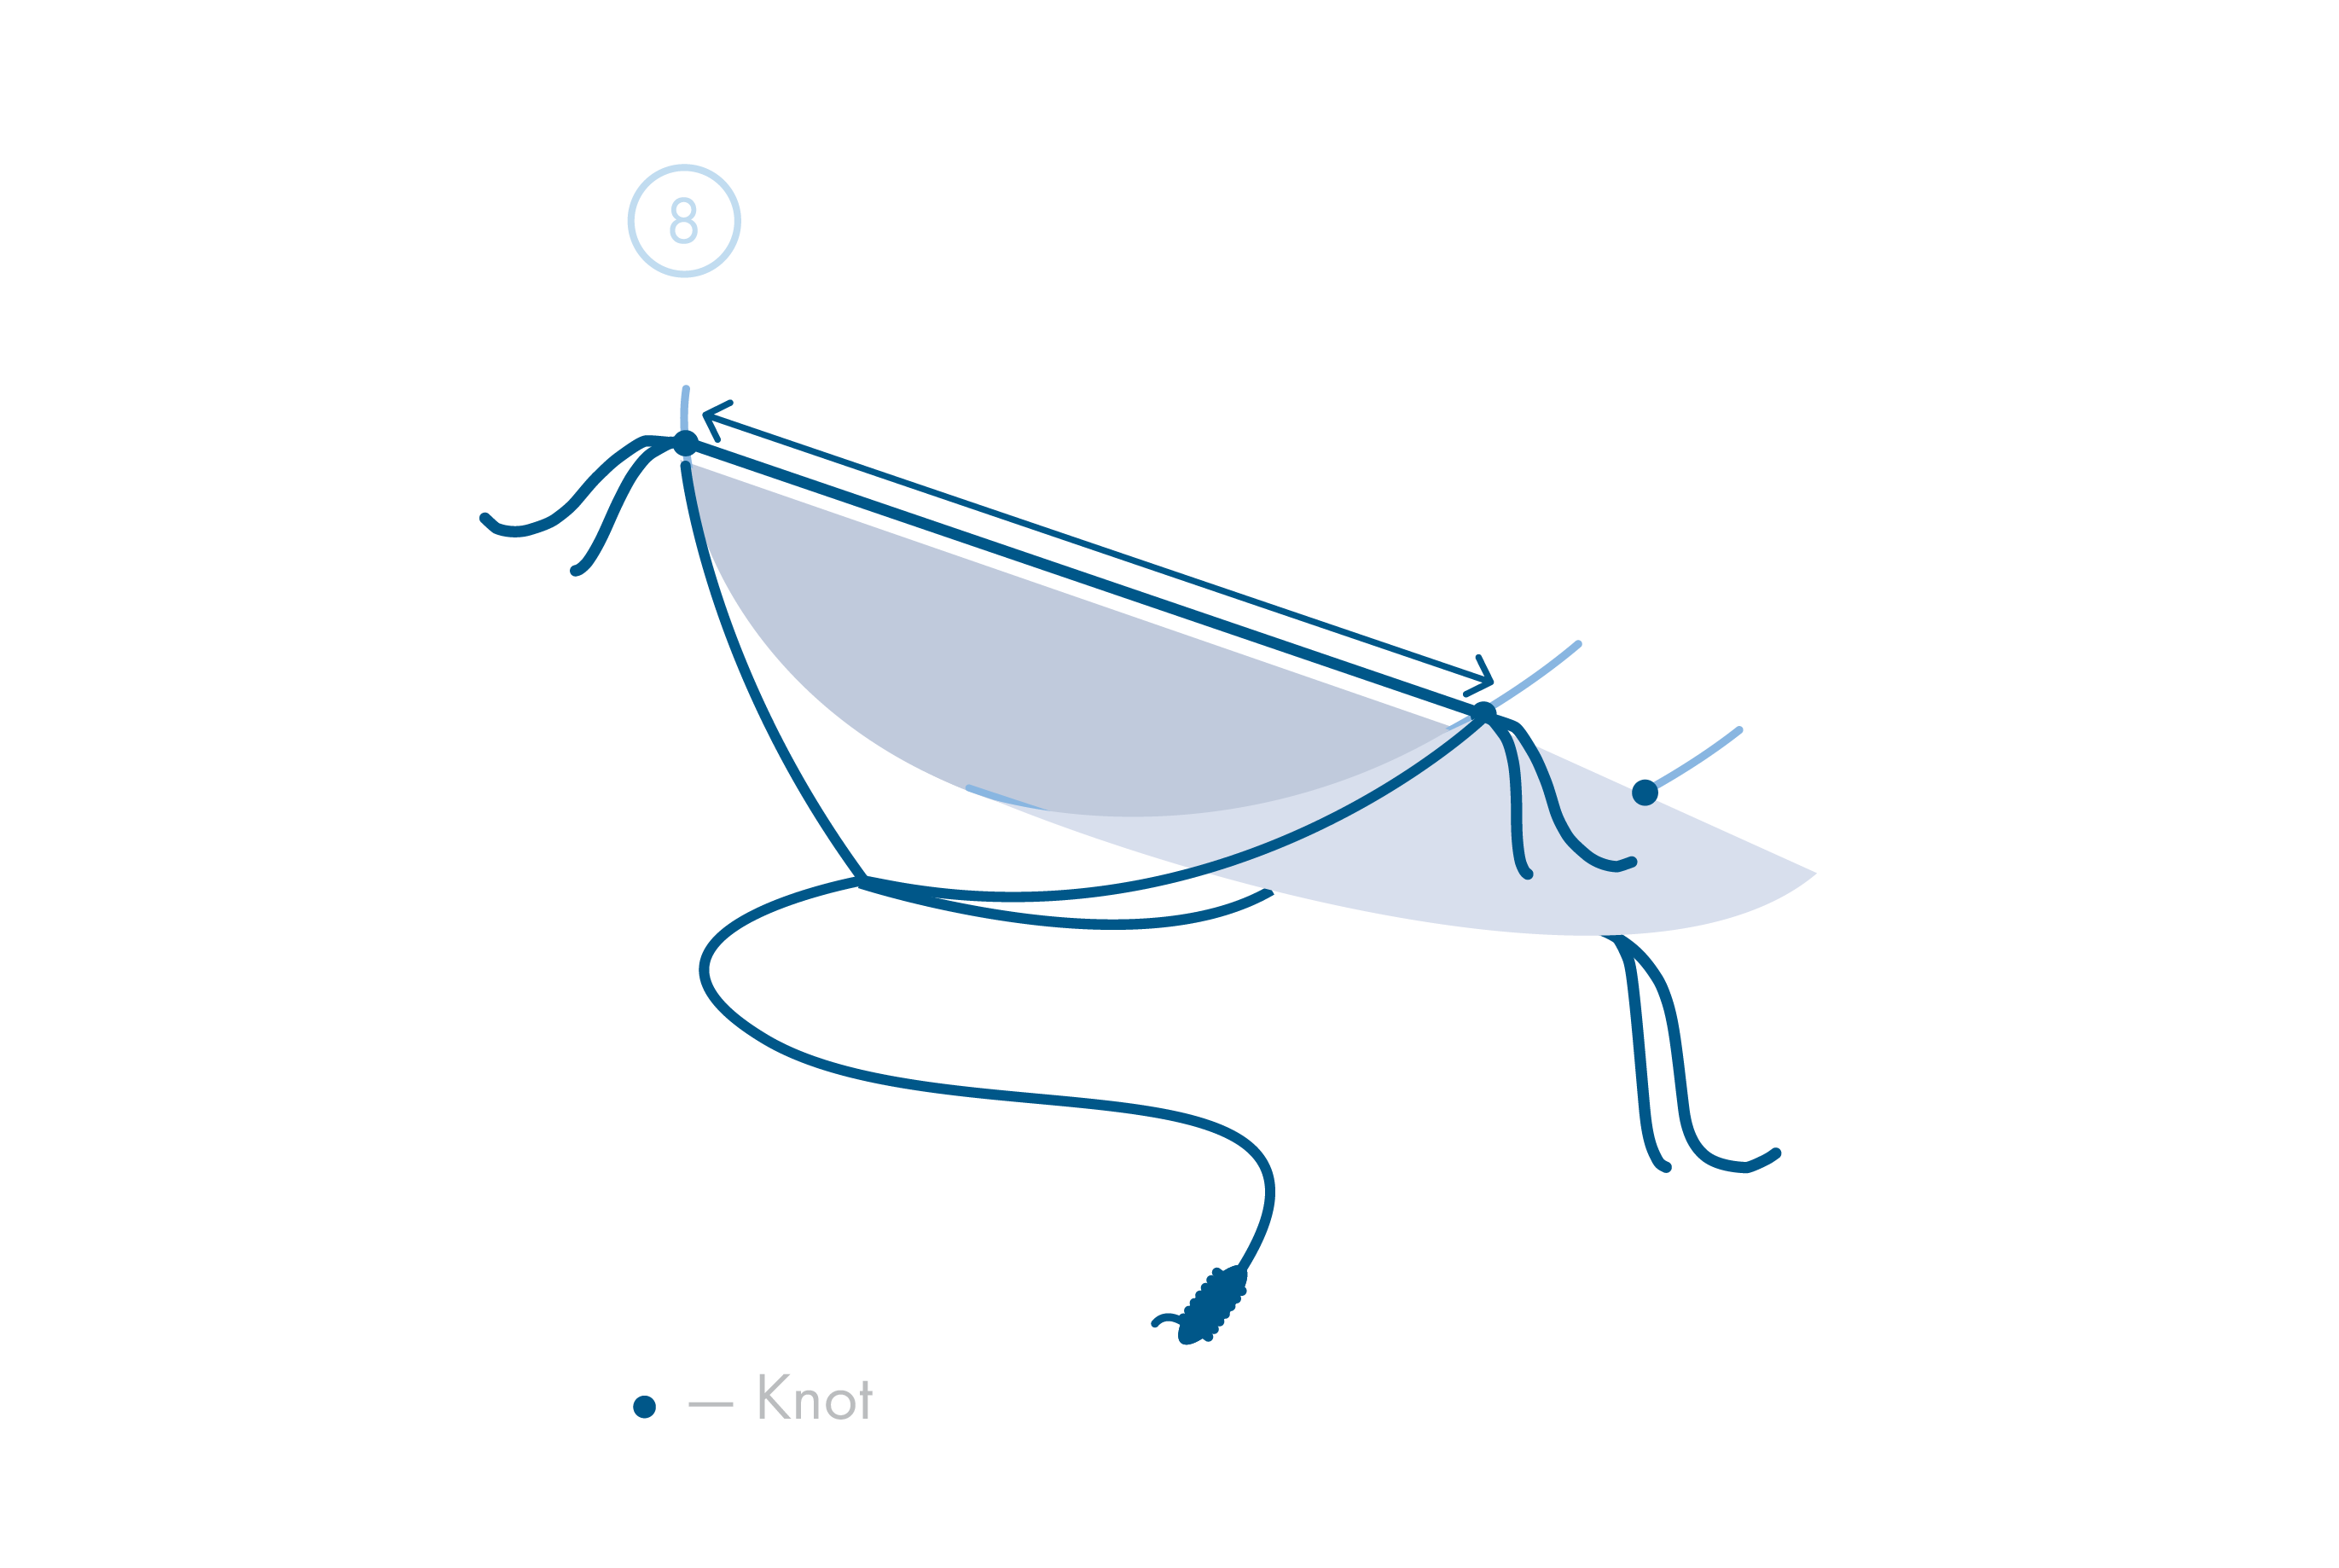
Bend the horizontal reed sticks into an arc and tie them with thread — this will help the kite catch the wind.
Your kite is ready!
It is best to fly it in hilly areas outside the city, where there are no obstacles.
How to prepare for flying a kite
-
Check the weather forecast. Without wind, even the largest kite, built according to the laws of aerodynamics, will not take off.
-
Wear a hat and long-sleeved clothing. Cover your skin with light-colored fabrics to protect yourself from the sun.
-
Apply sunscreen to all exposed areas. Don’t forget to reapply it, even if it’s cloudy. In open spaces and at higher elevations, the sun can be especially intense.
-
Take the kite home after flying and clean up all trash. If your kite flew and returned intact, you can save it for next time. If it didn’t withstand the wind, collect all its parts to repair or dispose them properly.
What wind is suitable for flying a kite?
-
0–4 km/h — if leaves barely move, the kite will most likely not take off
-
4–7 km/h — light wind: you may need to run to launch it
-
7–18 km/h — if leaves gently tremble, the wind is suitable
-
18–30 km/h — strong wind: the kite will fly, but it will be harder to control
-
30+ km/h — if tree branches are bending, the wind may be too strong
What to pay attention to:
-
strength: the kite is ready if it holds its shape and doesn’t come apart
-
center of gravity: the tail is positioned exactly in the center, side ribbons are equal in weight, and the line is attached centrally
-
the paper “body” of the kite is intact and can withstand wind tension
-
string length: long enough for the kite to become a tiny point in the sky
-
natural materials: if the kite fails in strong wind, it will cause less harm to the environment